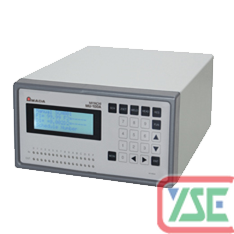
Head controller:MU-100A
▶ Quality control of fine spot welding
It is important to control the weld current, voltage, welding time, applied force and displacement for improvement of fine spot welding quality.
AMADA offers MU-100A Head controller for measuring applied force and displacement and MM-Series Weld checker for measuring weld current, voltage, and welding time to sustain weld quality.
-
◆Weld head control and force and displacement measurement.
Head Control and sequence function not provided by MM-Series weld checker are available.
Nine types of measurement modes with a variety of functions including monitoring displacement before welding and setting internal zero reset. -
◆Corresponding displacement sensors and load cells are newly added.
The displacement sensor is available from 0 to 25mm, and the load cell is from 0 to 10kN.
Contact Amada for more information. -
◆Up to four channels to monitor simultaneously: Two force sensors and two displacement sensors.
Available even when series welding, parallel gap welding, and indirect welding. - ◆Up to 127 schedules can be saved.
-
◆Offset adjustment of controller for each sensor
- * For calibration, please send us your displacement sensor and force sensor together with the MU-100A. We conduct calibration at our site and issue calibration certificate with charge.
- * The calibration is conducted for only the sensor purchased from Amada.
- * For the load cell with 10kN or over, contact Amada.
▶ Connection with peripheral devices
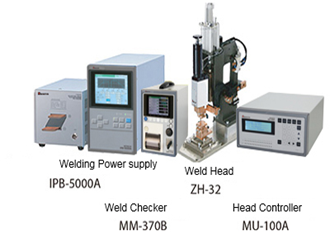
Further welding quality control can be realized using with our weld checkers.
| Model |
MU-100A-00-00 (1-axis type: Force 1 and Displacement 1) |
|
|
MU-100A-00-01 (2-axis type: Force 2 and Displacement 2) |
||
| Power requirements | Single-phase, 100 to 240 VAC±10% (50/60Hz), 0.5 A | |
| Operating environment | Temperature 5 to 40℃, Humidity 90% or less | |
| Storage environment | 0 to 55℃ | |
| Number of schedules | 127 | |
| Communication | Ethernet, RS-232C, RS-485 | |
|
Displacement sensor (Options) |
Measurement range |
0 to ±50.000 mm *1 30-mm displacement sensor or shorter:±0.015 mm *1 50-mm displacement sensor: ±0.025 mm *1 |
|
Load cell (Options) |
Measurement range |
0~10kN *2 (Accuracy: ±3% FS) |
- *1*2 In case of using the sensor purchased from Amada Miyachi.
- *2 For the load cell with 10kN or over, contact Amada Miyachi.
◆MU-100A
Weight: 3.3Kgs

You can choose from nine measurement modes in accordance with your requirement.
| Sequence Mode | Sample Hold 1 Mode |
|---|---|
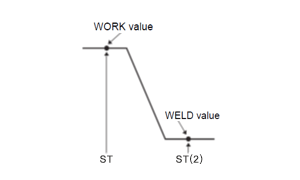
| Measures the thickness of a workpiece before welding and measures its displacement value after welding. | Measures the thickness of a workpiece at your designated point. |
 |
|
| Sample Hold 2 Mode | Sample Hold 3 Mode |
|
Measures displacement after zero-resetting prior to welding. It stops welding when the displacement value reaches the set value.
|
Measures the thickness of a workpiece and its displacement at a given point in time. When to start and end measuring can be set.
|
 |
 |
| Synchro Mode | (Force) Sequence Mode |
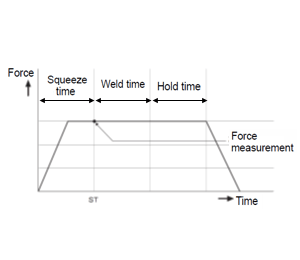
| Measures force, the thickness of a workpiece, and displacement both before and after weling. | Measures force prior to welding and starts welding when the force is judged to be appropriate. |
 |
 |
| (Force) Sample Hold 1 Mode | (Force) Sample Hold 2 Mode |
| Measures force at a given point in time. | Starts welding when the force reaches th set value and measures the maximum force during welding. |
 |
 |
| Tangential Mode | |
| Starts welding when the force reaches the set value and measures force after welding. | |
 |


